Table of Contents
Proxmox VE 2.0 + DRBD cluster installation
Introduction
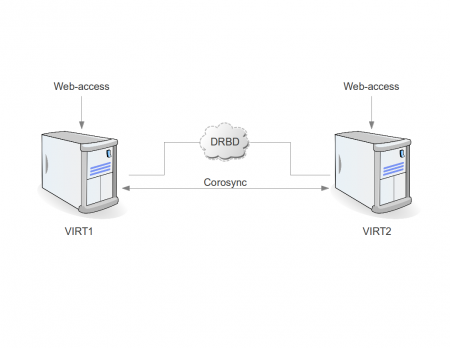
Main purpose of this configuration
- Reliable virtualization platform based on only two hardware nodes with ability to use “online migration”
Minimum requirements
- Two PC/Servers with:
- AMD-V or VT-x support
- At least 2GB RAM
- 2 HDD (first for Proxmox, second for DRBD)
- Single 1Gbit/s network adapter
- Accessible NTP server (for example: ntp.company.lan)
Recommended requirements
- In addition to minimum requirements:
- one or two extra network adapters for each PC/Server (for DRBD communications) and direct connection PC-to-PC on these ports (without any switches); use round-robin bonding in case of two adapters
- one extra network adapter for virtual machines
- Fast RAID configuration with BBU as a replacement to second HDD (/dev/sdb)
Cluster installation
- Install two nodes (virt1.company.lan / 10.10.1.1 and virt2.company.lan / 10.10.1.2) and login with user “root”
- Update both nodes (highly recommended): aptitude update && aptitude full-upgrade
- On virt1:
- add “server ntp.company.lan” to /etc/ntp.conf
- /etc/init.d/ntp restart
- ntpdc -p
- pvecm create cluster1
- pvecm status
- On virt2:
- add “server ntp.company.lan” to /etc/ntp.conf
- /etc/init.d/ntp restart
- ntpdc -p
- pvecm add 10.10.1.1
- DONE!
DRBD installation
The following steps are supposed to be done on both nodes (identically)
- Create partition /dev/sdb1 using “fdisk /dev/sdb”. PARTITIONS ON BOTH NODES MUST BE EXACTLY THE SAME SIZE.
- aptitude install drbd8-utils
- Replace file /etc/drbd.d/global_common.conf with
global { usage-count no; } common { syncer { rate 30M; verify-alg md5; } } - Add file /etc/drbd.d/r0.res
resource r0 { protocol C; startup { wfc-timeout 0; # non-zero might be dangerous degr-wfc-timeout 60; become-primary-on both; } net { cram-hmac-alg sha1; shared-secret "oogh2ouch0aitahNBLABLABLA"; allow-two-primaries; after-sb-0pri discard-zero-changes; after-sb-1pri discard-secondary; after-sb-2pri disconnect; } on virt1 { device /dev/drbd0; disk /dev/sdb1; address 10.10.1.1:7788; meta-disk internal; } on virt2 { device /dev/drbd0; disk /dev/sdb1; address 10.10.1.2:7788; meta-disk internal; } } - /etc/init.d/drbd start
- drbdadm create-md r0
- drbdadm up r0
- cat /proc/drbd # to check if r0 is available
Following steps are supposed to be done only on ONE node
- drbdadm -- --overwrite-data-of-peer primary r0
- watch cat /proc/drbd # to monitor synchronization process
- finally both nodes become primary and uptodate (Primary/Primary UpToDate/UpToDate), but actually no reason to wait until they are synced (very long), /dev/drbd0 is already available on both nodes and we can go to the next step - create LVM on top of DRBD
- DONE!
LVM on top of DRBD configuration
Following steps are supposed to be done on both nodes (identically)
- change /etc/lvm/lvm.conf
--- /etc/lvm/lvm.conf.orig    2012-03-09 12:58:48.000000000 +0400
+++ /etc/lvm/lvm.conf    2012-04-06 18:00:32.000000000 +0400
@@ -63,7 +63,8 @@


 	# By default we accept every block device:
-	filter = [ "a/.*/" ]
+	#filter = [ "a/.*/" ]
+	filter = [ "r|^/dev/sdb1|", "a|^/dev/sd|", "a|^/dev/drbd|" ,"r/.*/" ]

 	# Exclude the cdrom drive
 	# filter = [ "r|/dev/cdrom|" ]
Following steps are supposed to be done on any single node
- pvcreate /dev/drbd0
- pvscan # in order to check
- vgcreate drbdvg /dev/drbd0
- pvscan # in order to check
- DONE!
Create first Virtual Machine
- go to http://10.10.1.1 and login with root
- Data Center → Storage → Add → LVM group
- ID: drbd
- Volume group: drbdvg
- Shared: yes
- Create VM (right top corner)
- choose appropriate settings for a new VM until Hard Disk tab
- Hard Disk → Storage: drbd
- Finish creation
- DONE! Since now we can start VM, install operation system and play with online-migration


